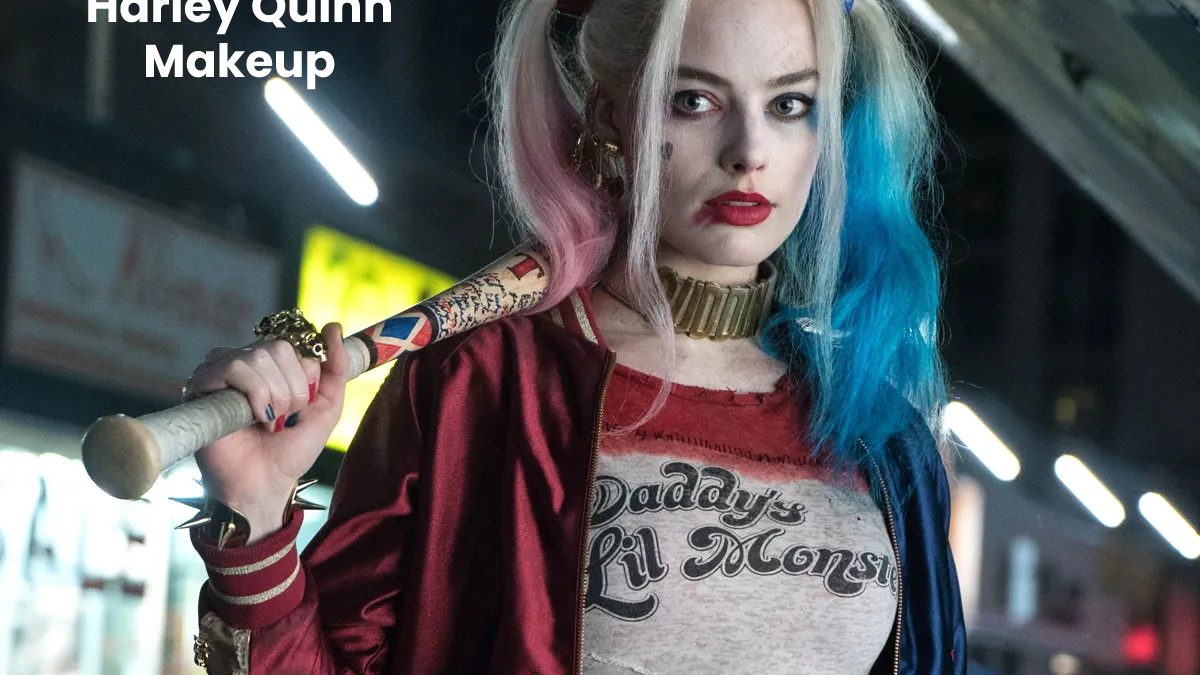
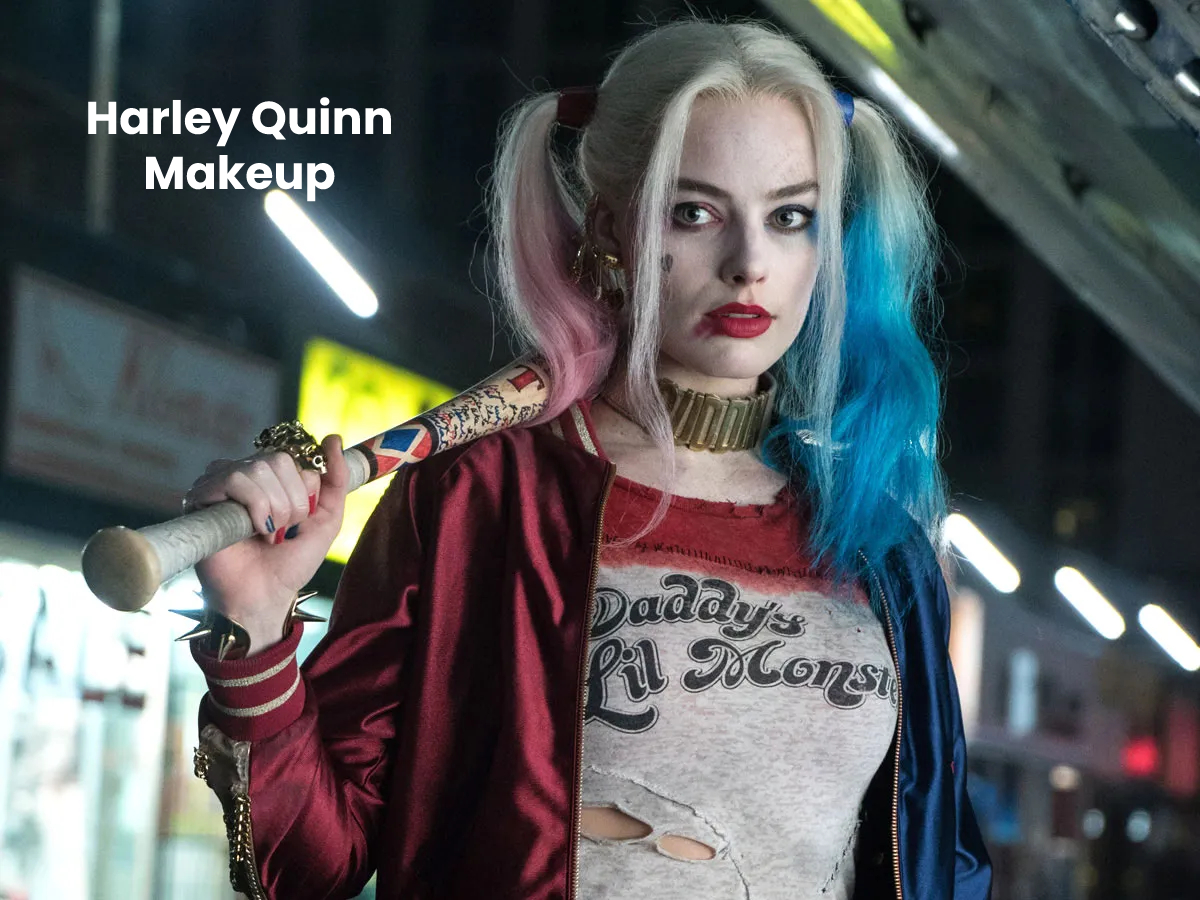
Harley Quinn Makeup: Few Halloween costume ideas are more timeless and easy to put together than Harley Quinn. Not only are her painted pigtails and smudged lipstick ripe for Instagram; they also don’t require the patience or skill of most Halloween makeup. Plus, with Joker breaking box office records, becoming Gotham’s bad girl this year seems particularly timely.
So, with that in mind, we’ve teamed up with makeup artist Lijha Stewart (also known as the Halloween Queen) to break down all the tips you need to pull off Harley Quinn makeup. Read on for the full step-by-step tutorial.
Table of Contents
How to DIY Harley Quinn Makeup
Level of difficulty: Easy. If you can smudge makeup and throw your hair in sophomore-style pigtails, you can do it with no problem.
Step 1: Contour and highlight.
Even though Harley’s skin is really pale in the movie, to make her look more realistic and wearable, we bypassed a few key areas. Glide a sculpting stick over your cheekbones, hairline, under your lips, and over your collarbones. Blend it in with your fingers or a polishing brush.
In an effort to capture that angsty, faded look even further, set everything with matte loose powder and keep highlighting to a strategic minimum, placing it only in certain places like under your brow bone and the inner corner of your eyes.
Step 2: Accentuate your brows.
For light or sparse brows, “it’s best to start with a brow wax so that any color you put on sticks after,” says Stewart. With a spool brush, apply a light coat of wax and brush the bristles up and out. Then, using an angled brush, apply the desired shade with light strokes.
Step 3: Smudge on eyeshadow.
The trick to getting eyes like Harley Quinn’s isn’t in how you smudge your shadow, it’s in the pigment you use. While regular shadows are great and can sometimes deliver intense color, it’s best to opt for a cream here. You can literally smudge it with your fingers if you want, but laying it down with a medium-sized eyeshadow brush will do just fine.
To achieve this splattered effect, take the color that remains on your brush during the initial application and swipe it outward and downward. Oh, and don’t forget to use two different brushes for your red and blue. Mixing them together will make both colors look muddy, not the look you’re aiming for here.
Step 4: Add dimension to your eyes.
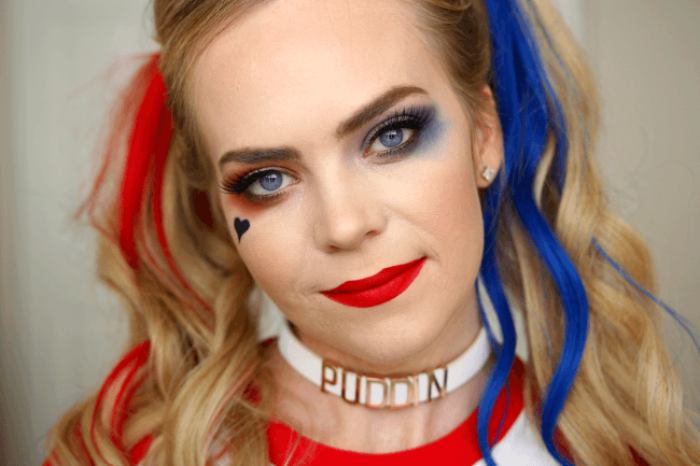
To add dimension to your eyes, line them with a thin layer of black eyeliner and smoke the edges for a sultry effect. Next, take a small amount of black shadow and swirl a blending brush around the outer corners. To top it off, add a white pencil to your waterline for a doll effect.
Step 5: Layer on glitter.
Now for the messy but most fun part: the glitter! Once you have your blue and red pigments handy, wet a flat shadow brush first and foremost. You’ll want to do this every time before dipping it into the glitter so there’s minimal fallout.
When applying your glitter, take your time and keep wetting your brush. Pat it on gently and follow the shape you’ve already created with your eye shadow – no need to get creative here. Pro Tip: If stains fall out, clean them up with tape.
Step 6: Apply red lipstick and draw on tattoos.
Almost done! When choosing your red lipstick, go for a creamy cherry red that will blend easily. Apply as usual, then take your finger or a small shadow brush to sweep the color on the lower lip downward. Then sponge. Apply another layer of rouge on top to shine as desired.
Now for the tattoos. Due to its intensity and easy-to-use applicator, a black felt-tip eyeliner works best when drawing over shapes and words. Draw the outline of a heart below your eye, just on the apple of your cheek. Don’t worry if you mess up, just make sure you have a cotton swab and concealer handy to clean up any wobbly edges.
For the “Rotten” tattoo, we recommend getting a friend to write it, simply because doing it on yourself in a mirror means it will appear upside down. (Remember Karen’s rhinestone “K” in Mean Girls? Yeah, that’s what happens when you try to write stuff in a mirror.)
Step 7: Spray on hair color.
Last but not least: those classic Harley Quinn pigtails. If you don’t have blonde hair, there are tons of Harley Quinn wigs you can use. But if you already have blonde hair, it’s a breeze to DIY. And there are several ways to achieve the look.
First, put your hair in pigtails. (Curl them first, if you want them to be more bouncy.) Then you can opt for hair color chalk or hair color spray. Warning: Everything will be messy, but if you spray hairspray on top, your color should set for a few hours. Additionally, it may be a good idea to wear disposable rubber or plastic gloves during application.
Also Read: Indie Style